Book Review: Staying With It

An Aging Athlete Becomes Enlightened

[Editor Note: We are reprising this article from Nov. 2015 because it contains important themes of persistence and adaptability. And the book Staying With It was written by one of our favorite authors, the venerable John Jerome, a former editor of SKIING magazine.]

StayingWIth__501

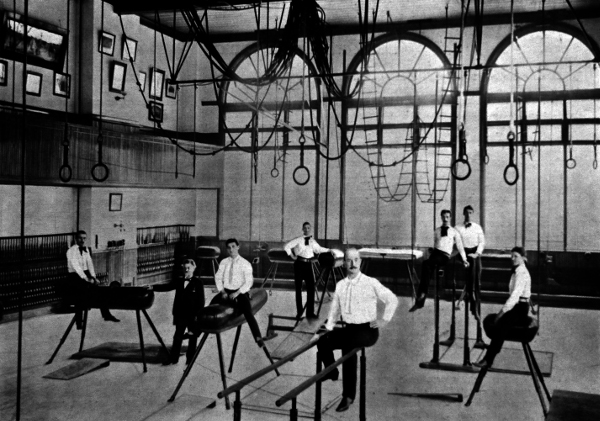
What happens when a 50-year-old writer decides to fight aging by becoming an athlete? Will physical awakening, sharpening, perfecting hold off the loss of function, range, performance? When former SKIING Magazine editor John Jerome found himself at the doorway to old age, he decided to do something about it. That something was his four-year voyage into athleticism to see if he could counter the effects of aging with muscle power, insight, and, as it turns out, mindfulness.

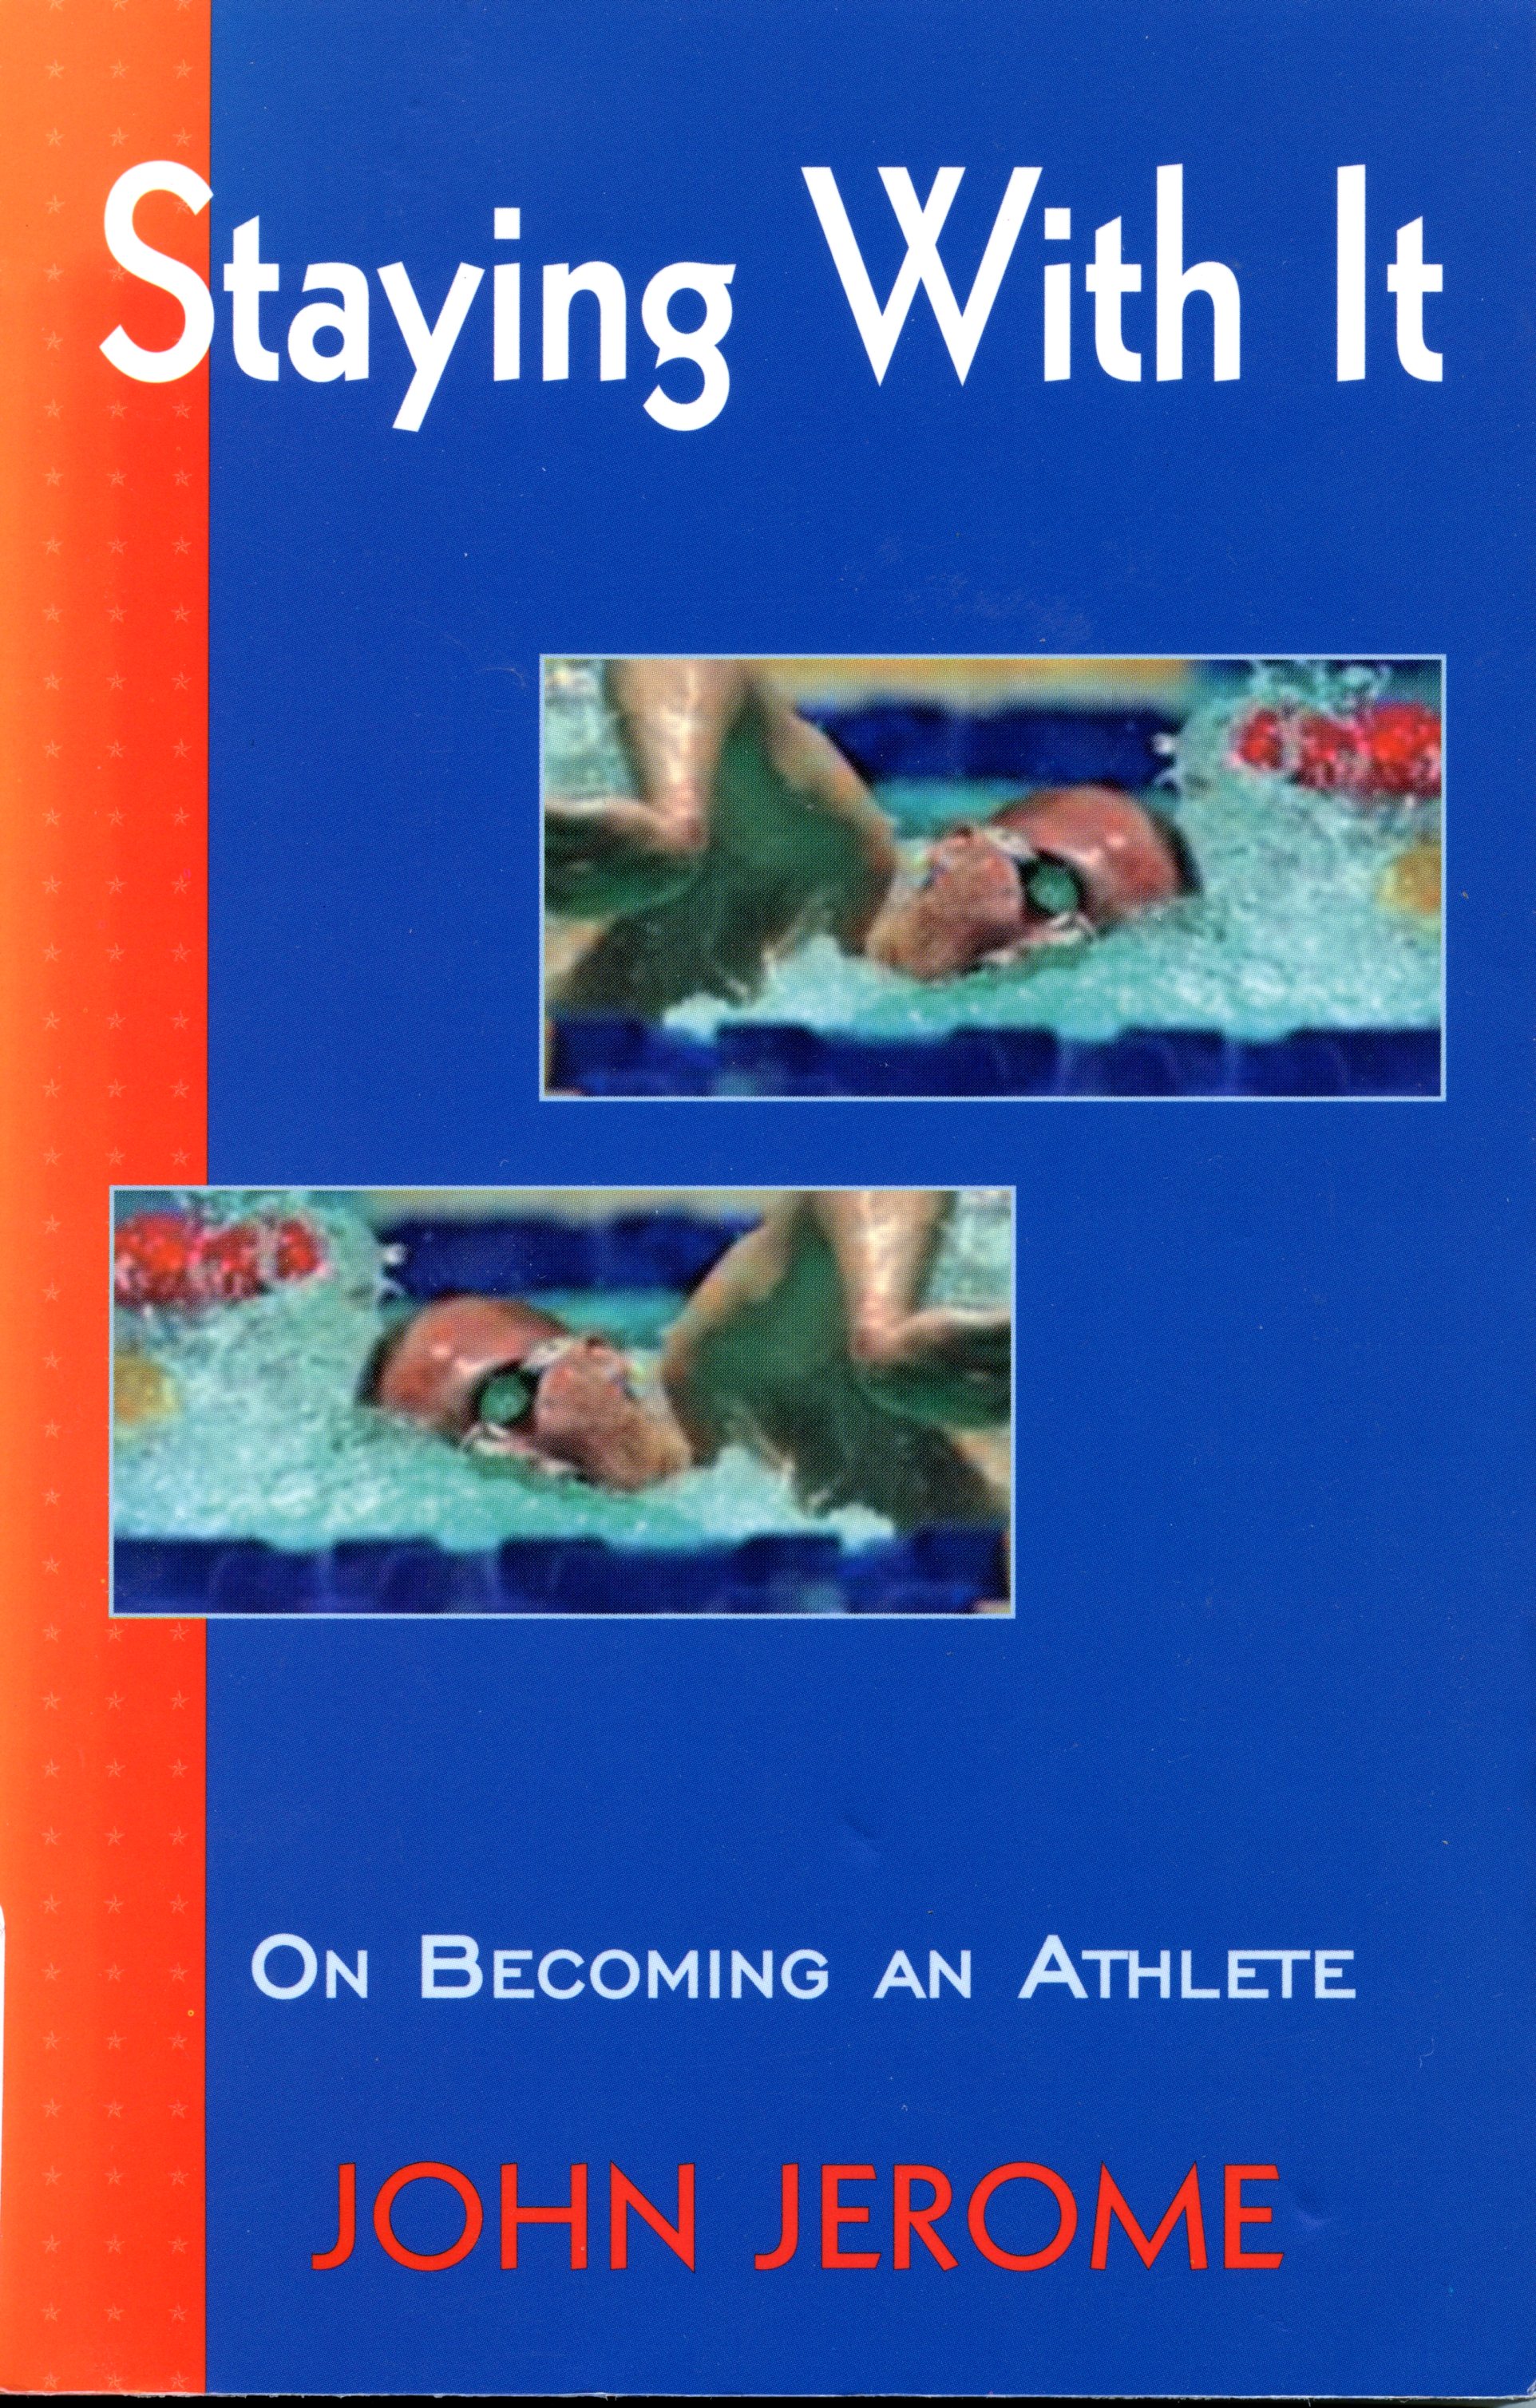
He tells his story in Staying With It, (Breakaway Books, 1992), a journey of trial, error and learning told in his usual reflective—and discursive— style. We recently re-discovered Jerome’s writing while paging through old, bound copies of SKIING magazine. When we learned he decided to become a competitive, masters-level swimmer at age 50, we wanted to explore his journey for our own edification as well as for our readers’.

At the beginning, he says, “Aging is very rude, making no attempt at diplomacy, at softening its message. It just starts slamming doors in your face, yanking things out of reach.” Jerome said he “was interested in giving up any capacity as slowly as possible…understanding and acknowledging the process.” His goal was “the maintenance of full function beyond the years of youthful vigor.”

To do that, he starts an experiment, swimming first as a fitness replacement for running and then training hard as a competitor. He discovers the Training Effect, body’s response to increased physical demands that gets cells to respond and do more. “To age,” he says, “is to begin asking the cells to do less.” The only antidote he says he could find was “movement—exercise and stretching.”

Jerome tells us about his training regimen, his lessons in exercise physiology, his trips to swim camps where he meets fellow enthusiasts, his many swim meets and consults with scientists. When he talks of perfecting his swimming stroke, he finds that simple physical task opens the door to complex mental aspects. He discovers “pre-verbal” tempo, right-brain control of the action, what we now call “flow”. “Learning to operate in your right brain is another part of the athlete’s job I had never considered before.” You know it, of course, when you ski cross-country “in the groove”, or swing through giant slalom turns without, well, without thinking. One way to induce that, he says, is to relax. “The athlete has to maintain a small amount of relaxation…The right brain knows this. Sometimes you have to wait, to ease up, to feel around in your capacities for just the right touch to make the motion work.”

Because his training program was largely self-directed and John was a self-admitted type-A personality, he eventually drove himself too hard, over-training and catching “Olympic Flu”, the syndrome that leads finely tuned athletes into exhaustion and even depression. After resting, he turned to a sport physiologist who used software and underwater video to analyze his stroke. Result: return to racing more enlightened. But, he says, “I wish I hadn’t started so late. I wish there were more time. I keep hurrying, and I’d really rather not do that.”

Of his experiment, he says, “I may not have stopped aging in its track…but I have certainly stopped the loss of intensity.” And, “the more I trained, the better the rest of my work goes, the sharper, and clearer and more efficient.”

John Jerome has written several books on fitness as well as other topics. Staying With It is available from Amazon.com.

Out Of Control

The Day Three Slump

This is my shortest ever blog, but it may have a significant impact on your next ski holiday.

Should have taken the day off.

It’s your first day back on the slopes, and you want to hit the ground running.  You don’t want to miss a thing, so you‘re up early, on the first chair, and skiing like a mad thing all day.  It feels so good!

The next day you’re just a wee bit sore, but not enough to stop you.

But on the third day you hit the “Day Three Slump”.  Your skiing seems to have got worse.  Your energy levels have slumped.  You hoped you’d get better; it’s frustrating.  At the end of the week you feel you’ve made no improvement; got no better than last year.  This is how your week may go:

Source: Bob Trueman; Bobski.com

I have a suggestion for “slump day”:  take it easy, be patient, don’t push it, do lessthan you might.

Would it be sacrilege to suggest taking a later breakfast?  An even greater sacrilege to suggest starting at 11:30 and finishing at 2:30?  Or, if it pleases you, consider taking a half day out and visiting a local place of interest. You could spend an amusing hour or two in a ski shop trying to guess which of this year’s new wonder skis is actually last year’s but in different livery.

Tomorrow do just a little bit more.  On day three you’ll be ready to fly; stronger, your muscle memories will have kicked-in.  You’ll find yourself skiing better, not worse.

At the end of the week, you’ll be skiing better than last year, and you won’t get home feeling frustrated that your skiing is in decline.

Your week will go like this and end on a high:

Source: Bob Trueman; Bobski.com

It will be a better feeling and well worth a try!

Keeping Tight: Maintain Muscle Mass As You Age

Four strategies make fitness simple

When it comes to fitness, the old saw about “use it or lose it” is not only true, for certain age groups, it is a challenge of sorts.  Why?  Because, according to Dr. Frank Lipman, founder of the Eleven Eleven Wellness Center,  New York, muscle decline starts at age 40 and actually accelerates every decade you grow older.  By the mid-70s, there is potential for losing half your muscle mass, he says.  That is, if you are sedentary and inactive.

On the other hand, if you are reading this, chances are you are an active and engaged sportsperson and have been for a good chunk of your life.  Nevertheless, if you want to maintain your muscle fitness as you age and slow muscle-mass loss, there are some important strategies Dr. Lipman recommends.  You may be doing some of these things already; if you aren’t, consider how you might adopt some new practices.

1.  Press and pant.  Dr. Lipman says exercise is the prime strategy.  Resistance training and aerobics are the cornerstone exercises

Light weights are good for bone density and muscle mass preservation. Credit: SeniorsSkiing.com

Light weights are good for bone density and muscle mass preservation.
Credit: SeniorsSkiing.com

to pursue.  Our personal preference is year-round group exercise classes at a good gym, fitness club or YMCA.  Regularly scheduled group classes give you a specific time to show up, and keep you motivated.  You can also learn a lot about muscles and the impact of exercise from an excellent class instructor.  Skilled instructors will vary their workouts, and when you take a couple of classes a week, you get into a habit.  And then there’s the camaraderie of working with a group of like-minded, supportive classmates from week to week. Of course, your personal doctor can give you advice about what kind of exercise is best for you.

2.  Ramp up protein.  Forget the low-fat diet.  Raising your protein consumption is the best weapon in slowing muscle deterioration, according to Dr. Lipman.

“Take your body weight, divide it in half, subtract 10. The resulting number will give you the approximate amount of protein you should be eating every day. So, for example, if you weigh 160 lbs, then half of that is 80, minus 10 = 70 grams of protein spread over the course a day’s worth of meals…If you have renal issues, you should work with your doctor to determine an appropriate daily protein intake for your specific needs.”

3.  Make it high-quality protein.  Dr. Lipman advocates grass-fed beef or organic chicken.  Also organic white beans, black beans,

High-quality protein comes from grass-fed cows. Credit: Mike Maginn

High-quality protein comes from grass-fed cows.
Credit: Mike Maginn

chickpeas, lentils and leafy greens.  He also suggests adding Whey Protein from grass-fed cows.

4.  Add the right supplements.  According to Dr. Lipman,

“the supplements that have shown promise in preserving and supporting muscle mass, topping the list are Omega-3 f

atty acids; Vitamin D; L carnitine; Glutamine and B12/folic acid.”

What are you doing to remain fit?  Are you on a high protein diet?  How’s that working for you?

This article was adapted from www.drfranklipman.com.  Check with your doctor before starting any fitness or diet program.

Pat McCloskey

Covid Fitness

Pat in his ‘Rona mask, riding into great shape.

A Lot Of Us Are In The Best Shape We’ve Been In For Many A Year.

Gasping for breath up a steep climb recently on the mountain bike with my riding friends, I thought to myself, “Where is the race? Nobody’s going to the Olympics, why are we racing on this ride?” 

Then it occurred to me that my group and a lot of other groups of cyclists, runners, and other fitness enthusiasts are in really great shape.  People are not traveling for work or pleasure just yet, and a lot of folks have a lot of free time to get their work done at home and then go ride, run, walk, hike, or  some other form of exercise.  I am calling it Covid Fitness. and it is a national phenomena. 

I recently went into my local bike shop, Dirty Harry’s, in Verona, PA and learned their business is booming.  Barry Jeffries, the owner, told me that they have 350 bikes on back order and their repair business is off the charts.  Barry, Scott, Brocc, and the boys will have a record year in sales and service because a lot of people are turning back to cycling as a recreational activity during this pandemic. 

The health clubs are not fully operational yet and people need to get out.  What better way to do it than on a bicycle? As the bikes roll in the door from the manufacturers, the boys at Dirty Harry’s build them up as fast as possible and out the door they go.  Sold!!  All kinds of bikes.  High end mountain and road bikes, E-Bikes, kids bikes, commuter bikes, you name it.  They are selling like a fish sandwich in Lent. 

The Peleton home cycling exercise equipment is back ordered by at least six months and that is the case with a lot of sports equipment providers.  Most outdoor equipment manufacturers have had a strain on supply because of the surge in purchases due to the Covid 19 crisis.   A good news-bad news scenario for the sporting equipment industry in that record sales are being offset by a strain in supply.  They have the customers, many new to the sport, but are having a hard time keeping up with demand. 

So back to my group.  We have guys and gals who travel for work, guys and gals who are retired, and many working from home.  These folks have always been active but recently, they probably have ridden mountain bikes and road bikes more than they ever  have in recent years because the distractions have been put aside due to this pandemic.  I have complimented a lot of cycling friends on their fitness and their response has been, “Hey, Pat, I don’t have much to do.”  And, “We have not been able to go to work at the office, or sit and socialize in a restaurant, or go to a movie or concert, so really, outside of exercise, what do we have to do besides work at home  and read a book?” 

The end result is that a lot of us are in the best shape we have been in for many a year and my group keeps pushing, pushing, pushing every week on scheduled rides in various venues around our area of the country. The CDC says nothing better to combat this virus than boosting the immune system with sunshine and outdoor exercise. The texts and emails buzz every week with the proposed riding schedules, and the good thing is that at least we are not sitting around with nothing to do.

So, again, the pandemic has caused a lot of disruption to our lives as well as to lives all around the world.  It has caused a lot of us to reflect on what is really important in life and how we have taken things for granted.  This too shall pass, and the world will learn to live with these kinds of viruses and change our daily habits on how to deal with them.  But in the meantime, there have been some good things that have come out of this time and the great outdoors has been calling to a lot of us. 

Book Review: Fitness Can Be Everywhere, Every Day

How To Integrate Exercise Into Just About Everything You Do.

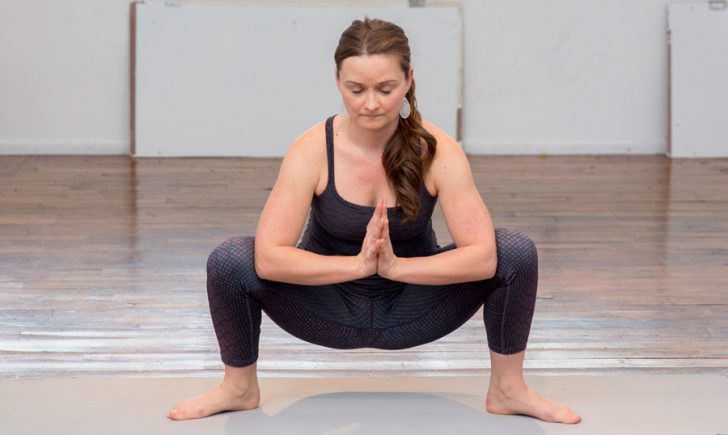
SeniorsSkiing’s readers all know and appreciate the value of fitness and exercise. Our surveys have shown that when the snow season is over, out come the golf clubs, bikes, tennis racquets, kayaks, hiking boots, and the like. Active lifestyles are us and part of who we are.

Enter the Corona Virus which, for reasons still unknown, goes after some people more viciously than others. Several risk factors are correlated with severity, according to Michael Osterholm, PhD, MPH, an internationally known infectious disease epidemiologist at the University of Minnesota. “If you’re over 65, you’re male, if you have underlying heart disease, hypertension, diabetes, certain lung or blood cancers or if you’re moderately to severely obese, then these are all risk factors for developing the disease,” said Dr. Osterholm in a recent interview. 

He goes on, “Healthy lifestyles are so important in reducing your risk for severe disease.”

Maybe your gym has been closed, you can’t ride trails in locked up parks, you’re bored beyond belief with walking your usual three mile loop, or, after four months of lock down, you’ve retreated to the couch and binge 0n Netflix. These are strange times, requiring new ways to do old things. Fitness is one habit to figure out how to maintain.

We recently received a brand new book that gives us 300 ways to keep that healthy lifestyle going.  Exercise specialist K. Aleisha Fetters’ Fitness Hacks For Over 50 is strike-zone for senior athletes and actives like us.

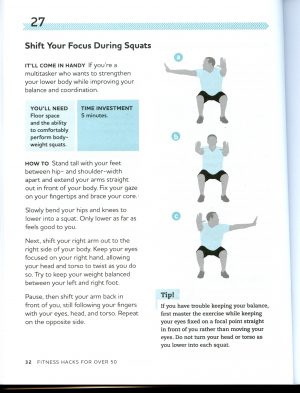
Fetters has created a number of simple things you can do—she calls them “hacks”—that build fitness activities into your day.  The book is divided into four major sections: Balance and Coordination, Flexibility and Mobility, Muscular Strength, and Aerobic Capacity and Endurance.  Note that while you are probably already engaged with a couple of these—we are overloaded on muscular strength—there are others that need attention.

For example, how many readers focus on Balance and Coordination activities, a skill critical to aging? Here’s an interesting one. Close your eyes when you’re exercising in place, brushing your teeth, making the bed, or washing dishes. Use your senses like hearing and touch to compensate.  Simple? Try it. This is a mental game—brain-body coordination—that’s really important to master as we age.

Fetters defines flexibility as being able to touch your toes—the ability for muscles to lengthen and stretch. She calls mobility the ability to get up off the floor—how your joints actually move.  Different things.  Some hacks here include Lifting A Knee while standing against a wall, Reaching Behind your back, one hand over the shoulder, the other coming up the back. In this category, there are a number of yoga asanas (poses) including a full Salute The Sun sequence.

In Muscular Strength you’ll find a number of class gym-type exercises as well as novel ideas like Hover Over A Toilet Seat, handy in public rest rooms, or Squeezing Your Cheeks. Yes, those cheeks.

Fetters has 75 ideas for upping your heart rate from Hitting Intervals to Tickling Someone to adding steps in the mall, the parking lot, the airport.

This is an excellent reminder to us that it is important to move the body in a variety of ways every day.  Fitness Hacks For Over 50 makes exercise accessible to us all, so we can continue our healthy lifestyle even though the gym is closed, and the couch is calling us.

Fitness Hacks For Over 50: 300 easy ways to incorporate exercise into your life, by K. Aleisha Fetters, CSCS, is available on Amazon for $12.99 (Kindle) or $15.99 (Paperback).


Spring Is Time To Bike Fit

Ride More, Enjoy More With Properly Fit Bike.

Harriet gets fit in a bike shop studio with an Oriental rug on the floor. Credit: Harriet Wallis

If you think your bike hates you, it’s time to schedule a bike fitting. If you hurt when you ride, there’s probably a mismatch between your body’s geometry and the geometry of your bike.

Sure, all bikes look pretty much alike. They have wheels, pedals, handlebars and seats. And they come in sizes – essentially small, medium and large. But your body’s measurements are more complex than that.

Unfortunately, many dedicated bike shops will say: “Find the bike you like and we’ll fit it to you.” That usually means they’ll jiggle the seat up and down.

A real bike fitting includes taking body measurements: shoulder width, arm length, leg length, sit-bone width, and more. You’ll have to ask around to find who’s the real bike fitter in your area.

Some physical therapists are qualified bike fitters, while others are bicycle fitting gurus. A skilled fitter can solve arthritis-related and other structure-related aging problems so it will be fun to ride your bike.

This is what the computer sees. Credit: Harriet Wallis

A fitting  can take about an hour, and the fitter is likely to suggest a different seat or stem or some other component to make it compatible with your body’s unique geometry. They can’t change your body, but they change the bike to suit your body! All this comes with a price tag, but it’s worth it if you want to have fun riding after the snow melts.

Here are some ways to figure out what’s wrong, but if you change one thing then something else will probably feel wrong. A real bike fitting should help you be “one with your bike.”

1. If your knees hurt, you’re seat’s probably too low, too far back, or both.

2. Ask a friend to watch you from behind. If your hips rock back and forth even a little bit, your seat’s probably too high.

3 If your hands, arms, shoulders or neck hurt, you’re probably too far away from the handlebars.

4. If your neck hurts, your handle bars might be too low, too far away, or both.

5. If you feel you’re just not getting enough power for your push, lots of things are probably out of whack.

Friend Laurie is fit by a physical therapist. He placed markers on key areas to analyze her alignments on the computer. Credit: Harriet Wallis

Nordic Walking Burns More Calories

If You’re Going For A Walk, Bring Those Poles. Easy, Accessible Efficient.

Add Nordic walking to your virus-beating activities to stay in shape.

Staying active outdoors during the COVID-19 virus crisis is easy and very accessible with Nordic walking, which is a fitness activity that combines walking with specially designed poles to engage the upper body muscles. Like cross country skiing, the poles are used to match each step a person takes. It’s an easy, inexpensive workout with remarkable benefits, according to a study by the Cooper Institute, Nordic walking burns up to 40 percent more calories compared to just plain walking.

It’s better than walking because it provides an easier cardio workout by increasing the heart rate 5-17 beats per minute more than normal walking without increasing the perceived rate of exertion. It also provides an upper body workout that includes shoulders, arms, chest, and back muscles. And it’s a low impact exercise, so it’s easy on knees and joints.

A good pair of walking or running shoes, comfortable clothing, and Nordic walking poles will get anyone started. People of ALL ages and ALL fitness levels can receive the calorie burning and aerobic benefits of Nordic Walking. The winning combination of improved posture and the shock absorbing benefits of the poles help many individuals to walk comfortably – even those with balance issues, knee issues or new knees, hip issues or new hips, back issues (including those with rods in their back), weight issues, multiple sclerosis (MS), Parkinson’s, neuropathy, arthritis, bursitis, scoliosis, lumbar stenosis, fibromyalgia, post polio, osteoporosis, stroke recovery and other limitations to walking.

For those who are unfamiliar, trekking (hiking with poles) and Nordic walking are two different activities that use very different poles and techniques. It may sound silly, but perhaps “walking is not just walking.” The pole angle, weight, grip, and straps are different between those modes of walking. The Nordic walking pole is designed to allow your hands to relax in order to target the larger wrapping muscles of the back. But using poles of any kind automatically stimulates your spine and all of the muscles around it, even with inefficient technique. When walking, the key postural muscles of the core and upper body are engaged.

I’ve been a Nordic Walker for a few years and found many of the claims for the activity regarding posture and exercise to be true. I’ve always been in search of a way to decrease the amount of time spent exercising, so I was sold when I heard that using the poles increases caloric burning by 40 percent. Cross country skiers will find it easy to quickly master Nordic walking. As a bonus, after a summer of Nordic walking, I noticed a marked improvement in my cross country ski poling in terms of strength and timing. It seemed that I increased the amount of forward momentum that was attributable to poling and I was able to pole stronger and longer when skiing.

Nordic Walking provides an exercise foundation for anyone, ranging from those just looking for an activity to lose weight to health aficionados interested in taking it to higher levels of fitness

Have You Been Drinking? It’s Time To Start!

Hydration and Stretching: Two Things You Must NEVER forget to do before you hit the slopes.

If you’ve taken to heart the advice in a previous seniorssking.com article of Paul Petersen, president of Bear Valley Cross-Country in California, on the best way for seniors to get in shape for skiing, you’ve developed and faithfully followed a fitness regimen focusing on balance, strength, flexibility, and cardio. But the 56-year-old certified alpine and cross-

Bear Valley Cross Country's Paul Petersen swigs water, something we should all remember to do. Credit: Paul Petersen

Bear Valley Cross Country’s Paul Petersen swigs water, something we should all remember to do.
Credit: Paul Petersen

country ski instructor will quickly tell you that this is not enough. What you do in the days before and right up to the minute that you put ski or board to snow is just as important as all the pre-season conditioning you’ve done.

One of the most overlooked factors in preparing for a day on the slopes is hydration. When your body is well-hydrated, your body temperature and heart rate are more stable, your joints and muscles function better, and you have more stamina. Conversely, if you’re dehydrated, which can happen more quickly at elevations above 5,000 feet—especially to flatlanders, you won’t be able to perform well for any length of time, you’ll tire more easily, and you may experience dizziness, headaches, or shortness of breath. Says Petersen, “When it comes to hydration, you have to think ahead. You can’t properly hydrate for athletic activities the day before; you need to begin several days beforehand. Remember, you’re not trying to hydrate your stomach, but rather your joints and muscles and that takes a while.”

If you’re a typical skier, before you head out for the slopes, you probably have a cup of piping hot coffee or tea in the lodge (this may be in addition to the glass or two of wine you had at dinner the night before). This is a total recipe for dehydration! “Any liquids with caffeine or sugar, including sodas,” says Petersen, “are NOT a net positive in the hydration department!” For every cup of coffee or other caffeinated beverage you drink in the morning or while on the mountain, Petersen insists that you drink an equivalent amount of water.

Noting that senior wintersports participants schedule longer trips and thus ski more consecutive days than the average skier, Petersen emphasizes the importance of recovery for seniors after a day on the slats and boards. “Right after you’re done on the slopes and before you hit the bar, hit the protein bar,” he strongly advises. “For me, the magic bullet is protein powder in water. Either helps you recover from that day and helps your body get ready for the next day.”

An equally important factor in ensuring a safe, fun day on the slopes is adequately stretching your muscles right before you start out. We’ve all done those cursory arms over our heads while stretching our waists and quick calf stretches, right? Not good enough per Petersen! “You can’t just touch your toes, grab your ankles, stretch your thighs, and then walk out the door,” he warns. “The night before, put aside a few minutes to stretch your hips, calves, and thighs, and again the next morning before you put your boots on, either in the parking lot or at your locker.”

In sum, make “water, stretch, go” your wintersports mantra if a perfect day “doin’ it” is what you’re after!

Foam Roll Out Those Nasty Knots

An amazingly simple and immediately effective DIY massage relaxes stiffness and removes pain

The foam rolling technique of self- massage is exceptionally beneficial in increasing athletic performance, reducing pain, and helping with injury recovery/prevention —especially for older snow enthusiasts.

The medical term for rolling out is self-myofascial release.  “Myo” means muscle, and “fascial” refers to the fascia, a framework of

Foam Roller gently elongates tight muscles and relieves pain. Credit: Protherapy Supplies

Foam Roller gently elongates tight muscles and relieves pain.
Credit: Protherapy Supplies

connective tissue that covers the muscles and organs in one continuous structure from head to toe, like a tight sweater over our musculoskeletal system.  A restriction in one area can affect fascia and muscles in a completely different part of the body, not unlike pulling fitted polypropylene long johns in one direction and causing the fabric to twist and tighten on another part of the frame.

When fascia is restricted (e.g. injuries, surgeries, poor posture), the muscle beneath may not be able to return to its normal length after contracting, resulting in compromises in range of motion, blood flow, nerve stimulation, and lymphatic drainage.  This produces an inflammatory response and nasty little trigger points—or “knots”—that develop in the muscle and/or fascia. Any pressure applied to these trigger points can cause pain.

It’s not uncommon to feel areas of referred pain from another part of the body when compressing a particular trigger point, something to expect with the rolling device.

The good news about trigger points is that when pressure is repeatedly applied against a rolling device in a slow manner with the person taking FULL, DEEP breaths, the pain dissipates quickly, eliminating the myofascial

A massage ball can really concentrate gentle pressure on knots. Credit: Pro-tecathletics

A massage ball can really concentrate gentle pressure on knots.
Credit: Pro-tecathletics

restriction and allowing the muscle to elongate and nearby joints to move fluidly with increased blood flow to the area. The result is enhanced athletic performance.

It’s best to roll out before heading to the mountain.  Your muscles will be more supple, and your joints limber and pain-free. For maintenance, roll out daily, either at night or in the morning (or if you can, both.)  Start small and progress to longer sessions of myofascial release. While this technique works for all physical activities, skiers should focus on the lower body–hamstring, IT band, Achilles, quads. That said, don’t forget to include the back and any other areas of chronic pain. And for your (HIGHLY recommended) post-skiing stretch, roll out first.

You may have some pain at first, but that should subside after a few times rolling out. In fact, your muscles may soon crave the roller at the end of a long day on the mountain, even more than you crave that après ski beer.  And with some dedicated time to rolling out, don’t be surprised if your body feels years younger! It may hurt at first, but the pain should subside after a few times rolling out. In fact, your muscles may soon crave the roller at the end of a long day on the mountain, even more than you crave that après ski beer.

[Ed Note:  We have tried myofascial self-massage and can report immediate relief from lower back pain stemming from tight hip flexors and knotted piriformis muscles.  Your mileage may vary, but we are very impressed with this technique. As these videos show, you can use a foam roller or a massage ball.  We used a hard lacrosse ball to really focus on tight knots. Here are some links for rolling exercises and products:] 

Runners World Foam Roller Instruction Series

Finally, some rolling device vendors:

OPTP Foam Rollers

Orb Massage Balls


Ski Instruction

Gone In A Flash

What Happened To Me And WhyYou Should Treasure Your Health And Fitness.

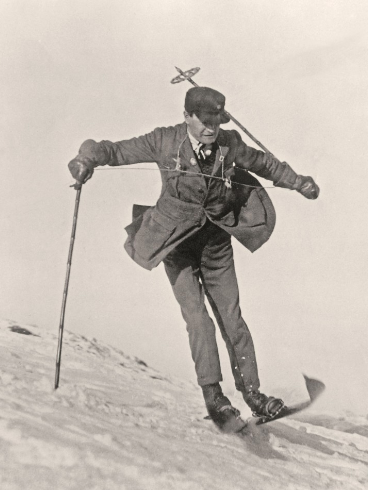
As I get older, each ski season is more precious than the one before.  I’m pushing 60+ years of skiing, and early in my life, I learned never to take one for granted.  Except for being deployed overseas during Vietnam and Desert Shield and Storm, I haven’t missed a ski season in decades.

There is a rhythm to my ski year.  After the ski season, I change my conditioning routine and start ramping back up after Labor Day up so that by December, I’m ready to ski my usual 25,000+ vertical feet.  Yes, at my age I’m bragging!

On August 23rd, my routine changed thanks to a bacterial infection in my right elbow.  During the bursectomy, the surgeon found an infected ulna bone, tendons and muscles in my forearm.  Aaaaaaarrrrggggghhhh!

Samples were sent to a lab to grow cultures and find out what the bug was.  Over the next four weeks, the four drains were slowly removed.  Exercise was not possible because dirt in the sweat could lead to a staph or other type infection, and I had very limited use of my right arm.

Eleven weeks later, the culture and susceptibility tests told the doctors that the infection was a hard to kill avian acid fast bacilli.  It takes a combination of three powerful antibiotics taken daily over eight to 12 months to kill it. It gets worse because this is one of the bug that often develops immunity to antibiotics so sometimes in the middle of the treatment, one has to start over.

As luck would have it, I had an allergic reaction to the antibiotic that was the most effective against the avian bacilli that sent me to the emergency room having difficulty breathing, a 102 degree fever, rashes and hives all over my body.  I was off everything other than steroids and antihistamines to get my system back to normal.

The bug and the toll the antibiotics were taking on my body sapped my stamina.  I’d work on a book for four to five hours in the morning and after lunch, I was exhausted and it was nap time.  By nine at night, I was ready for bed!

Exercise, you have to be kidding!  Go skiing?  No way.

So now in early December, two MRIs and two sets of x-rays later, I’ve started walking again and am up to about four miles every day.  By the time this is published, hopefully I’d daily sessions on an elliptical or a stationary bike.

Next major checkpoint is another MRI and x-rays in early January to see if my ulna bone is continuing to heal.  Blood work every other week gives an indication the drugs are working.  My goal is to ski late in late March but its 50-50.

The point of this piece is simple.  Don’t take any ski season for granted.  Each season, each trip, each run is precious, and they could be taken away from you in a flash.  Just ask!

Shape Up 3: Challenge Yourself

Five Basic Exercises Ramped Up To High Intensity Levels.

[Editor note: This is the third and final in our series of preparation exercises for senior skiers from Rick Silverman, physical therapist and certified strength and conditioning specialist. We started with basic hip and leg exercises (Oct 25), raised the intensity of those (Nov. 7) and now present a more challenging level of those same exercises.  As you can see, these are clearly a step up in intensity. Use these to extend your exercise program.  If you haven’t been limbering up so far this season, don’t start here.  Seriously.  These are challenging.  As always, if you have any issues, complications or questions, consult your medical advisor before beginning.]

 Quad Squat Jump

Last time, we introduced the Static Quad Wall Sit.  In this one, we get dynamic. Use a small exercise ball or a light weight. Squat down, jump up.  Repeat.  Try doing this for 20 seconds on, 10 seconds off for two minutes.

Leg Raise Sitting Up

The key is straight leg and toe pointing up.  Support yourself on your hands.  A variation is to point your toe inward on the way up and outward on the way down.  And vice versa.  Don’t let your heel touch.

legraise_situp_1legraise_situp_2


Dynamic Lunges

Rick has been a Telemark skier for 25 years.  He said this move imitates the same leg motion used in making Tele turns.

Hamstring Bridge

Keep the ball rolling in and out.  Use a chair with rollers.  Watch your lower back on this one.

Inner Thigh Lift

In previous articles, we showed you how to work your glutes and outer hip flexors.  Here’s one to use for the inner thigh.  You might want to rotate through all three exercises in your work out.

hipflexor_inner


A huge thanks to Rick Silverman for showing us how to ramp up for the snow sports season.  If you don’t have a regular exercise work out habit, consider starting with our first series of exercises here.  But, please, don’t start the season without some physical preparation.


Shape Up 2: Up A Notch

Revving Up Intensity For Our Five Basic Exercises.

[Editor Note: Last month, we reprised a set of baseline exercises focusing on legs and hips as part of a get-ready strategy for this season’s snow sports activities that was originally published in 2016.  This week, our exercise guide, physical therapist, certified strength and conditioning specialist and teleskier Rick Silverman, shows us how to up these exercises to the next level. As with any exercise plan, make sure you don’t overdo it; recognize your limits. If you have any issues or complications, please check with your medical advisor. In a couple of weeks, we will show you the highest intensity level for these activities.]

Static Quad Wall Sit

We used to do this in our college freshman dorm as a macho challenge. Sit against the wall, legs at 90 degrees.  You can use a ball, as Rick does here, or just lean against the wall.  Start with a relatively comfortable time, say, 20 seconds. Work your way up to 60 seconds. And don’t overdo this one!

quadwall_static_1


Sit Up Leg Raises

Bring your upper body up, support yourself on your elbows.  The key here is keeping your leg straight and toes up.  Don’t rest your heel on the ground on the downbeat. A variation is to point your toes to the right on the up and to the left on the down and vice versa.

legraise_sit_1

legraise_sit_2


Alternating Lunges

Bend knee to 90 degrees and no more. Alternate right and left if you want or do eight reps on the right, eight on the left and repeat.

lunge_alt1

lunge_alt2


Hamstring Bridge

You can use an exercise ball for this or a chair with rollers.

hamstring_bridge_1


Glute Leg Raise

Add this hip area exercise to the Outer Hip Abductors we showed you last time.  Remember, hip strength plays a big role in all snow sports moves. You will feel this in your butt, for sure.  Don’t raise your leg too high. Again, work your way up to 16 reps x 2 sets.

hipflexor_glute


The most important take-away from all this is to do something to get into shape for the snow sports season.  Cycling, hiking and all those other summer sports are terrific conditioners.  If you’ve been active all summer, try some of these as a test of sorts to see where you stand, conditioning-wise.  If you’ve not been as active, please take time to run through some of exercises. If you do these every other day, you will start seeing results in a couple of weeks.

Shape Up 1: Easy Starters for Seniors

Ease Into Shaping Up For Snow Sports With Five Basic Exercises.

This is an archive article reprised from Oct, 2016.

[Editor Note: It’s time to focus on strengthening legs and hips for snow sports.  This year, we are going to offer three “flights” of exercise with increasing challenge and intensity for the same group of muscles. We’ll publish these about two weeks apart, so get started now. We asked Rick Silverman, a physical therapist and ultra marathon athlete from Ipswich, MA, to suggest which exercises to focus on and to demonstrate them for you. Rick is a Certified Strength and Conditioning Specialist with an MS in Physical Therapy.  He’s also a 25-year telemark skier, climber and kayaker.  As with all activities like this, you may want to check in with your physician if you have any questions or complications.]

Please don’t start the snow sports season without toning up your muscles.  If you don’t get into shape, you’re inviting strains and sprains at the the very least.  You’ll tire more easily and, at the end of the day, you’ll be risking more serious injury.

Here are five basic, get-started exercises that you can do with minimal time, equipment and space. This exercise series will just focus on hips and legs. There are other resources online for core, lower and mid-back and shoulders and arms. We will add intensity and variation to these basic exercises in a couple of weeks.

Do at least two sets of eight reps of each for starters.

Quad Wall Squats

Either use an exercise ball or just slide up and down a smooth wall.  Squat down so your thighs are 90 degrees to your lower leg, and no further.

quadwall_ball_2quadwall_ball_1


Leg Straight Raises

The key with this one is keeping the leg you are raising straight and your lower back flat on the floor. Feel that hamstring! Raise to 45 degrees and down, not letting your heel touch the floor.

legraise_1 legraise_2


Static Lunge

Here’s one that focuses on hips and quads. You can put your back leg on a chair or on the floor.  Great one for balance, too.

staticlunge2staticlunge_1


Hamstring

Keep your butt off the floor. If you don’t have an exercise ball, use a desk chair with rollers.

hamstring_1 hamstring_2a


Outer Hip Abductors

Tight hips can cause mischief if they are not strong and supple.  These muscles run up to the central back and down to your knees.  If you have back problems, strengthening hips and core might help. This exercise is for the outer hip abductors. We’ll work the other hip muscles in a few weeks. Try to keep your toes pointing straight ahead.  A variation is to lift your leg with toe pointing down and lowering with toe pointing up.  Then reverse the pattern.

hipflexor_outer_


In a couple of weeks, Rick will show you how to notch up these exercises to the next level.  Right now, get some of these started.  And Just Do It!


Focus On Conditioning: Still Time For This Season

[Editor Note: This article was contributed by Peter Schmaus, MD, Orthopedic Spine and Sports Medicine Center, Paramus, NJ. and Senior Attending Physician, Hackensack University Medical Center. SeniorsSkiing.com is very grateful to have his view on conditioning.]

Pay Attention To Body Tuning Before You Hit The Slopes Or Trails.

Many of us pay more attention to our equipment than the most important equipment of all—us! Many ski injuries and overuse syndromes can be avoided by simple preventative maintenance. While sharpening your edges and maintaining bindings are smart, even more important is a musculoskeletal tune up on yourself. This is even more crucial as we age and the musculoskeletal system inevitably displays the wear and tear of the years.

We lose muscle mass annually as we age over 40, but this can be reversed with the correct exercise regimen. Joints inevitably become stiffened both from cartilage thinning as well as tightening of the soft tissues surrounding the joints and spine. These conditions, while not completely reversible, can be managed with exercise programs stressing both flexibility and strengthening.

While stabilization and core are buzzwords frequently used in the fitness field, for snow sports those words cannot be repeated too often. Fitness trainers, therapists, and physicians refer to muscle groups that are core stabilizers. These include the rectus abdominus, external and internal obliques, back extensors, and the pelvic floor muscles.

These are your natural weight lifting belt and lumbar support muscles. They stabilize and support the spine in all planes, and a strong core helps provide balance and force required to carve a turn or navigate a field of moguls. Core muscles even support your spine when pulling off your boots at the end of the ski day. Exercise methods include Swiss ball, back extension, modified crunches, various planks and supermen. All can be done in the home without elaborate gym equipment. And do not forget the simple push up and proper squat.

We frequently refer to the posterior chain, which includes the gluteal muscles, the hamstrings as well as latissimus, and back extensors. Regimens can include lunges, modified dead lifts, squats, kettle bells and burpees. If your bodyweight does not provide sufficient resistance, add some light weight. Simple flat plates, kettle bells, or even resistance bands will suffice. Then move on to side-to-side exercises, which simulate ski motion.  Keeping your center of gravity well centered is the physics behind a good day on the mountain.

Be mindful that snow sports, while not overly aerobic, do require exertion and therefore increased cardiovascular activity. That is aside from the long walk uphill though the parking lot with all your heavy equipment.

Also important especially as we age are balance exercises. Stand on a balance or wobble board. Not a challenge? Hold two light weights. Go through your regimen while remaining balanced on the board. It is not easy in the beginning, but the benefits of enhanced balance and stability are crucial on uneven terrain. Constructing a preventative exercise program well in advance of those first days on the mountain will reduce the risk of injury, making those days on the mountain more enjoyable and injury and pain free.  

Should I Take An Early Season Lesson?

[Editor Note: From time to time, we’re going to dip into our extensive archives for a story that might be useful, interesting, or entertaining.  Here’s one from 2014 from correspondent Harriet Wallis.]

Starting right sticks all season.

My friend says the same thing every winter. She says wants to take a lesson as soon as there’s more snow on the ground or when she has more ski days under her belt.

That’s been going on for as long as I’ve known her, and she still hasn’t taken a lesson.

If you’ve ever said that, you’re not alone. Many skiers and riders think that more snow or more ski days are the prerequisite for a lesson.

So I asked some ski pros about it.

Start early and bond with your instructor! Credit: Harriet Wallis

Start early and bond with your instructor!
Credit: Harriet Wallis

“Skiing is a seasonal activity, so whether you’re a vacationer who skis once a year or whether you ski all season long, you come back to it fresh at the beginning of the season,” said Tom Pettigrew, director of skier services at Park City Mountain Resort in Utah. Early season lessons are really beneficial because “all of your movement patterns are not totally engaged yet, so it’s easier to learn new patterns before you get entrenched in old ones.”

In addition, while the terrain might be limited, it’s actually an advantage. You can get comfortable on your skis and make learning breakthroughs without being distracted by vast terrain choices, Pettigrew said.

Scott Mathers, ski school training director at Alta, UT, says the same thing in a different way. “Your senses are heightened when you first start to ski again. You’re aware of how your body is moving and what it’s doing. But as you ski more, you get desensitized, making it harder for you to make changes.

“It takes a lot of practice for something to become ingrained,” he said. “An early lesson gives you something to focus on for the rest of your vacation or for the season.”

Will you take an early season lesson this winter?

To read more from Harriet Wallis, click here for her articles on SkiUtah!

Can You Ski Yourself Into Shape?

There Are Other, Fun Ways To Get Ready Besides Hitting The Gym.

Sure, you can do the gym thing. It’s not too late to hit the trails, too.

One of the myths I hear from people at the beginning of the ski season is that they can “ski themselves into shape.”  They have not really done any preparation for the ski season and feel that they just have to start skiing, and their ski legs will eventually come back.  If I ever heard fake news, this is it.  Skiing is a dynamic sport and in order to effectively execute a turn, your legs need to be in good shape before the first turn of the season.  I can’t tell you how many times I have see folks whose “legs are killing them” after the first and second day of a ski trip.  They ski defensively, because they are not in good shape and all the money that they have spent on a ski trip is for naught. That’s because they failed to get in shape before they got on that airplane.  The same is true for local skiers who make their way to their local ski area and have the same experience.

So why not start thinking about this now if you have not done so?  There are a lot of articles popping up in the ski periodicals and web sites about exercises that you can do in the gym.  But how many of us really want to spend time in the gym day in and day out to prepare for ski season?  How many times can we pretend to sit in an invisible chair with our backs to the wall to strengthen our legs?  On the other hand, there are outdoor activities that can be engaged to get the legs in shape but are also fun and allow us to be in the outdoors which is where we all want to be in the first place.

With the flaming leaves coming in to view, the trails in our mountains and parks are available for mountain biking, hiking, and trail running.  Hiking and trail running uphill prepare the legs for sure as well as providing an excellent outdoor fresh air activity.  Mountain biking ramps that up a bit by strengthening the legs on climbs, as well as simulating skiing skills like looking ahead and picking a path through varied terrain.

Lots of folks mountain bike, hike, and run during the summer season when the weather is cooperative, but when the time change looms—Nov. 4 this year, by the way—and the days get shorter, the motivation for these activities starts to wane.  If you want to be prepared for ski season, I would strongly suggest that you continue these activities as long as you can during the fall and into the winter if conditions allow.

A good friend of mine says there is no such thing as bad weather, just bad clothing choices. So why not buy a good Gore-Tex suit for running or hiking and also one to ride in the winter if you can do it.  Night riding is a favorite of mine, and there are a lot of options for rechargeable light and battery systems. I have used a lot of expensive lighting  options in the past but with the advance of lighting technology, you can now purchase systems for a fraction of the cost of the traditional main stream lighting systems.  Cree Mountain Bike Lights found on Amazon are an excellent choice for around $32.00 and provide three mode LED lighting with a rechargeable battery that can provide up to two hours of excellent light on high mode.  I use these lights on my handlebar with another one on my helmet.  I store the battery for the helmet light in my hydration pack and also the battery for the handlebar light can be attached to the top tube of the mountain bike.  I also purchase spare batteries and store them in my pack in the event that there are any issues with the primary battery.

It is not too late to get back on that bike, lace up the trail running shoes or hiking boots, and get moving.  Your legs will appreciate your diligence now in the early fall season, and you will enjoy your turns and ski outings much better if you take the time to be in shape when the first flakes start to fly in the mountains.

High tech bike lights allow you to ride into the evening hours when the clock changes back to Standard Time. Credit: MountainRides.com


BowlerSkier_489

Conditioning Can Beat Sarcopenia: Pay Attention Seniors

Sarcopenia Weakens Muscles In Aging Bodies, But It Can Be Managed.

If you’ve been lax about starting, continuing, or expanding your current conditioning program, it is time to get with the program. Many seniors are susceptible to weakened muscle as a natural effect of aging. When was the last time you picked up trash barrel, laundry basket, your bike, kayak, or even your skis, and you realized that they seem heavier than they used to be. The condition is called Sarcopenia, and it affects 13 percent of 60 year olds and as many as 50 percent of 80-plus.

In a recent New York Times article, Jane Brody, a personal health and fitness columnist, says that although the condition is fairly prevalent, not many seniors know about it.

Few practicing physicians alert their older patients to this condition and tell them how to slow or reverse what is otherwise an inevitable decline that can seriously impair their physical and emotional well-being and ability to carry out the tasks of daily life.

Dr. John E. Morley, a St. Louis University School of Medicine geriatrician, says that sarcopenia is to muscles as osteoporosis is to bones. “Sarcopenia is one of the most important causes of functional decline and loss of independence in older adults.”

The good news in all this is that the effects of sarcopenia can be reversed by exercise.

No matter how old or out of shape you are, you can restore much of the strength you already lost. Physical therapist, Marilyn Moffat, a professor at New York University, noted that research documenting the ability to reverse the losses of sarcopenia — even among nursing home residents in their 90s — has been in the medical literature for 30 years, and the time is long overdue to act on it.

That’s yet another reason to get back to conditioning.  Start a strength-building program using weights, bands, or machines.  As Dr. Moffat points out,

Start with two repetitions and, using correct form through the full range of motion, lift slowly and lower slowly. Stop and ask yourself how hard you think you are working: ‘fairly light,’ ‘somewhat hard’ or ‘hard.’ If you respond ‘fairly light,’ increase the weight slightly, repeat the two reps and ask yourself the same question. If you respond ‘hard,’ lower the weight slightly and do two reps again, asking the question again.

If you respond truthfully ‘somewhat hard,’ you are at the correct weight or machine setting to be exercising at a level that most people can do safely and effectively to strengthen muscles. Continue exercising with that weight or machine setting and you should fatigue after eight to 12 reps.

Now here’s a surprising insight. Your current exercise program might not be adequate to hold sarcopenia at bay.

The fact that you may regularly run, walk, play tennis or ride a bike is not adequate to prevent an incremental loss of muscle mass and strength even in the muscles you’re using as well as those not adequately stressed by your usual activity. Strengthening all your skeletal muscles, not just the neglected ones, just may keep you from landing in the emergency room or nursing home after a fall.

Exercise and paying attention to protein in your diet are the keys to remaining strong or at least as strong as you can be as you age. Read Jane Brody’s article and get busy.


Cycling Efficiency For Seniors

Bottom Line: Knoweth Thy Limits, Wise One.

Ride with younger guys? Then ride wise and slow down. Credit: Pat McCloskey

As I  was pounding the rocks of  Laurel Mountain on the mountain bike with  a group of younger riders here in Pennsylvania’s beautiful Laurel Highlands, I was thinking strategy.  At 63 years old, I am still in pretty good shape but the older I get, I start thinking about the old adage “age and treachery will beat youth and skill”.  Not really applicable in most cases but at least I can try – right?  So the first thing I think of is: don’t push the anaerobic limit to be the first up the hills and over the rocks.  Let the young guns deal with that and I will just keep them in sight.

I have learned to ride within myself and only exert myself enough to keep a visual on the group, especially with a longer three hour + ride.  A more scientific approach is the below which is done with a heart rate monitor:

  • Zone 1: 60 to 70 %; very comfortable effort; use this for warmup and cool down
  • Zone 2: 70 to 80 %; comfortable enough to hold a conversation; most training is done here
  • Zone 3: 81 to 93%; “comfortably hard” effort; you may be able to say short, broken sentences.
  • Zone 4: 94 to 100%; hard effort; the pace is sustainable, but conversation is a few words at a time.

Author Pat McCloskey ponders whether to go around a big section to get back to the parking lot.

Basically the zones are dictated by two theories.  The original theory is dictated by the target maximum heart rate of 220 minus your age. Then you can calculate with a heart rate monitor which zone you can ride in.  This calculation is not quite accurate because it does account for conditioning.  A better way to use the zones is to calculate what is called Heart Rate Reserve which is your max heart rate minus your resting heart rate. Find out what your real max heart rate is by exerting yourself in Zone 4 with a monitor and then in the morning at rest, calculate your true resting heart rate.  This allows for conditioning and the zones can be used according to that calculation on a heart rate monitor.  All in all, I use a monitor on rides to tell me when I am exerting myself above my perceived rate of exertion which will lead to fatigue on a long ride if I am not careful. Use the monitor and slow down accordingly.  As long as I keep the group in sight and can be in the Zone 2 area, I am a happy rider.

Another strategy is not to ride every section but take a breather and bypass a section and/or coast to the next meeting area.  Sometimes that means taking a fire road instead of a technical trail..  I like to challenge myself and take the technical sections but I know if I take them all, I will not be able to keep up or complete the ride.  Ride to ride another day is my motto, and I am not out to prove anything.

Lastly, know your limits and know when you are finished.  You don’t want to get hurt and if you are too fatigued, it can happen easily on a mountain bike.  Sometimes you have to cut out and take the fire road back to the parking area for a head start on the post ride beer.  Hey, you had a good ride, with younger, stronger riders, but for a guy who is older, this is the way to stay involved without compromising your ride or theirs.

Riding season is upon us, and there is no reason not to challenge yourself within limits.  Go for it.  Have fun but as Harry Callaghan once said, “ A man has to know his limitations.”

Cross or divert? Use your noggin and your heart rate monitor to decide. Credit: Par McCloskey

Sarcopenia: Insidious Muscle Loss Can Be Managed.

It Can Happen, But Don’t Despair.  Read On.

A fitness program that includes resistance training can forestall muscle loss.

Sarcopenia or muscle wasting is a condition which affects almost everyone starting about 50 years of age.  Do you have it?  Look in the mirror: Your once proud biceps and pectorals have sagged, your pants are falling down, no more butt, your legs look skinny. What looks like loose skin is really the loss of muscle. You find yourself skiing on easier slopes, minding how you climb stairs, playing less aggressive tennis, and basically losing muscle tone.

Is all lost? No, indeed.  A prominent medical school subjected a group of older folks who used walkers to a resistance training program.  In 90 days, they were able to ditch the walkers!

Apparently, the secret is a resistance training routine with some dietary changes.  A structured program in resistance, i.e., weight lifting, similar to a body builder’s program is the key.

In addition, older folk do not process proteins well. When it’s snack time, we go for crackers or other carbohydrates. This subdues your appetite but contributes nothing to your protein intake and robs your body of the space that could be utilized for protein.  Find a protein source for your snacks.  I am fond of beef jerky. Or try Greek yogurt, trail mix, almonds, peanut butter and celery, and others. Check here for ideas. Protein drinks are okay, but don’t use them as a meal replacement.

Light weights are good for bone density and muscle mass preservation.
Credit: SeniorsSkiing.com

Resistance training for seniors is a case of make haste slowly. There is potential for injury and an untrained individual needs to be careful. Proper form is absolutely critical for injury prevention and instruction by a professional is required, either at certified trainer at a gym or a physical therapist.

Medicare covers about 20 physical therapy visits a year. Get a referral from your primary care provider. Medicare with a United Healthcare supplement (AARP) has the Silver Sneakers Program which allows you unlimited visits to a gym on the program.

If you do have some resistance training experience but have been lax for a while, start off slow.  Start with a lower body workout—squats, lunges—that use your body weight only for four weeks.  Then add light dumbbells. A weight which allows you to complete three sets of 10 reps without undue exertion is the signal to increase the load, never more than about 10 percent.

Don’t forget your upper body. Most gyms have an array of weight machines which reduce balance issues.  Once again, find a personal trainer for a couple of visits to learn the form and reduce the chance of injury.

Follow your program three times a week.  You will feel stronger in a month, see results in two months and by the third month you will have developed a life-long habit.

As with all exercise programs, seek the advice of your medical professional and get expert help in starting out.


XC Skiing: Older, Wiser, And Cheaper

A Veteran Ski Instructor Finds Nordic Matches His Senior Skiing Philosophy.

A seasoned Alpine skier (left) compared to a pro Nordic skier. XC is easy to do wrong.
(Credit: Brad Noren_

Older, wiser, cheaper, what is this about? It reflects on what happens with age for most, but let’s put it into a skiing context. Having taught skiing since 1971, I’ve discovered these are the three adjectives that seem to reflect on one’s skiing philosophy with the passing of time.

Most of us in this age group probably skied a lot in the 70s and 80s, maybe even the 60s. I’m sure those memories are rich with fun, challenge and thrill. But as we move into the present, the love of the sport is struggling against those three words in many ways, and, for some, as the song says, “The Thrill is Gone”.

Over my many years of skiing and teaching skiing, I watched aging skiers make changes that were hard to accept (me included). This often resulted in some quitting the sport (not me included). Back to the “older” adjective; in brief, “the body doesn’t do that anymore”. The “wiser” adjective points to personal safety issues, and the “cheaper,” well, you know what that means.

Being “older, wiser, and cheaper,” I have found cross country skiing to be an excellent sport for seniors but often not understood or accepted by the once serious downhill skiing fanatic of decades past.

XC skiing will give you the opportunity to circumvent most of the “older” issues by building muscular strength, adaptive fitness, respiratory health, and the thrill of learning will return. A new challenge is in your future. XC skiing will make you much “wiser” on how your body parts really work, because you will be focusing on efficient movement, good diet, refined balance and more. XC skiing can also be “cheaper” than the downhill sport.

Being both an alpine and Nordic ski instructor, there’s a problem I’ve seen with the move from alpine to Nordic. Alpine skiers sometimes feel that since they are a seasoned, 40-year plus alpine skier, black diamonds, powder, NASTAR gold and all that they can put on a pair of XC skis and master the Nordic/XC sport.

Yes, you can try that but you will surely miss the fun, challenge, and the thrill. You must learn to XC correctly. XC skiing is easy to do BUT even easier to do wrong. I have seen this happen over and over again with close ski friends who are expert alpine skiers in their day. Ditch the ego and take a Nordic/XC ski lesson, you will not regret it. Yes, you will bring many skills in from your downhill resume, but you will also learn things you never even thought of. Your health will likely improve; you are going to be wiser learning a new skill, and you might—probably will—spend less cash.

And don’t give up your love for downhill because I also know your downhill skiing skills are going to be strengthened, and you will find a new thrill there as well.

For more information on properly learning XC skills, check out my web site, Nordic Fusion. As I tell all I ski with “Glide Long and Prosper”.

Shape Up: How To Get Fit For The Season

Progressive Exercises From Easy To Difficult Can Help You Tone Up.

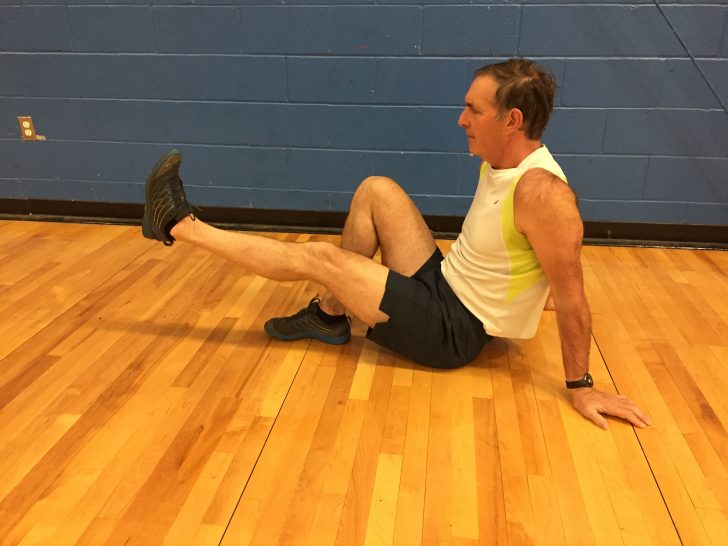
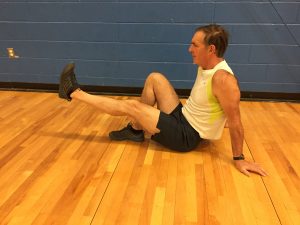
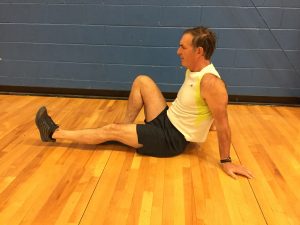
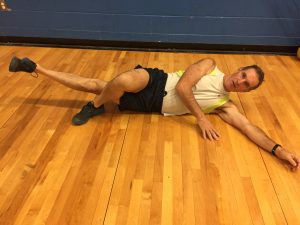
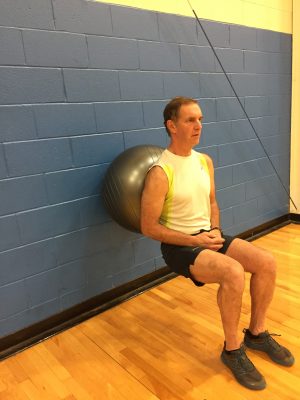
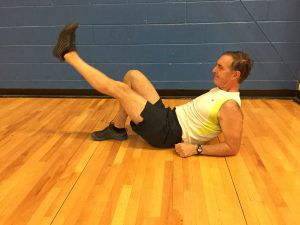
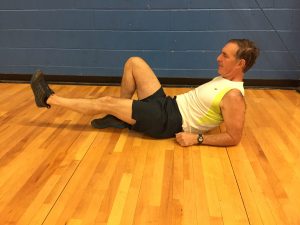
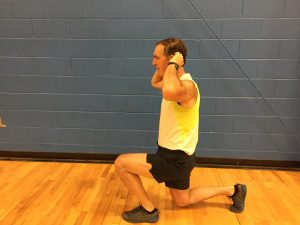
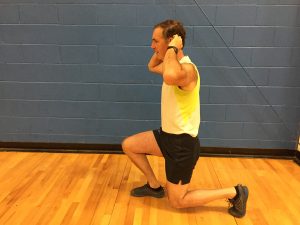
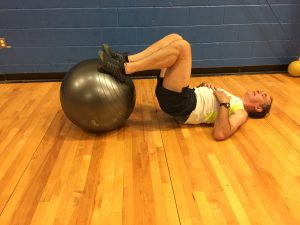
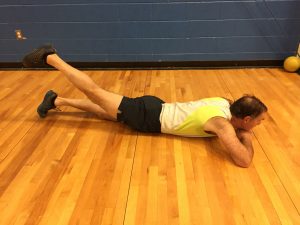
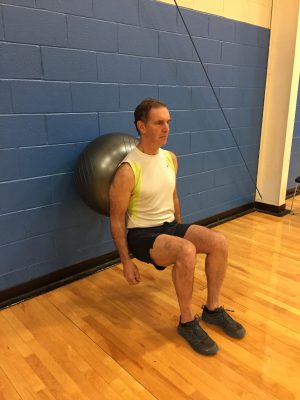
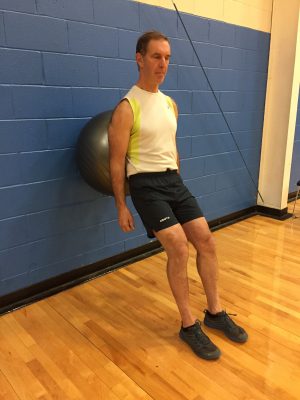
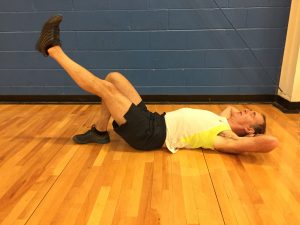
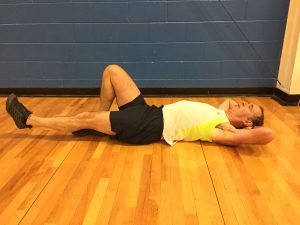
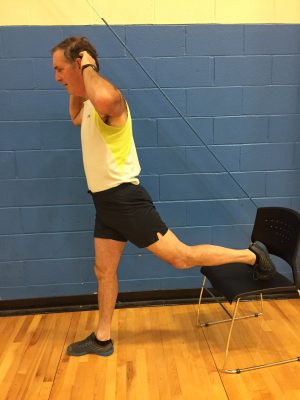
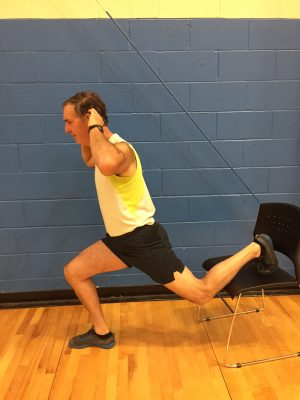
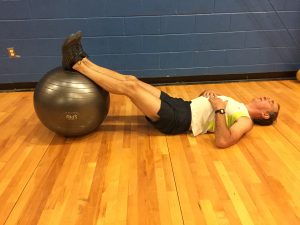
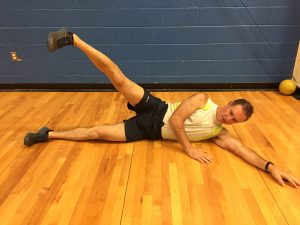
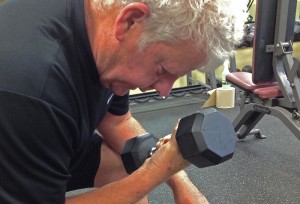
Okay, it’s late October, and you’ve put this off long enough.  You need to limber up for the upcoming snow season. Without topping up your muscles and stretching those ligaments, you can hurt yourself and have a very short season indeed. With some daily or weekly fitness routines, you can feel and move better on the slopes and trails.  So, get going.

Check out our collection of Conditioning articles under the Health tab.  We have recommendations for some basic yoga poses as well as advice on calibrating your exercise regime to your age.  Be advised, if you’ve spent the summer cycling, hiking or kayaking, you may find that you’ve got to pay attention to muscle groups that aren’t engaged in those exercise activities.  If you’re a walker, you need to think about your upper body.  If you’re a cyclist, what about those hamstrings and shoulders?  Rowing a kayak will build your arms, shoulders and abs, but what about your lower body?  See? Even though you’ve been active, you need to think total body for the season coming up.  Both Alpine and Nordic skiing require active muscles groups all over your body’s geography. So think total body work out.

Physical Therapist Rick Silverman starts us off with a basic leg lift.

Under the Health>Conditioning menu, you will find a progressive series of exercises that are designed to do just that. Physical Therapist Rick Silverman shows us a set of exercises from easy to moderate to more difficult that will get your battery charged up.  In the series, Rick demonstrates exercises for abs, quads, hamstrings, and hips. You can add your own favorites to this basic set including some basic yoga poses like squats, planks, and down dog.  Yes, add Tai Chi, too.

Here are some links the Rick’s series. And we have correspondent Rose Marie Cleese’s own story of her fitness journey for inspiration.  Check them out and start thinking about a regular conditioning program.

Rick Silverman’s progressive exercise series:

Easy Starters For Seniors

Up A Notch

Challenge Yourself

Rose Marie Cleese’s fitness journey starts here.

If you’re reading SeniorsSkiing.com, you are typically an active senior, so the advice in this article probably make sense to you.  Nevertheless, we know older folks who venture out into the snow world without preparing themselves and wind up injured and unhappy.  You can avoid this; get going!


Fitness Focus: The Essential Down Dog

Here’s One Of The Most Important Stretches An Active Senior Can Do.

[Editor Note: Our summer series Fitness Focus is taking a distinctive turn toward several important yoga positions. We’ve highlighted the Squat, the Plank, and now the Down Dog.  We are a bit biased toward these poses because we have experienced personal progress and various muscle pain relief by practicing them.  We’re curious, too, about your experiences with these and others.  Let us know.]

Downward Facing Dog
Credit: Yoga Basics

Hamstrings are the big muscles behind your thighs.  If you stand and raise one heel towards your backside, you are using your hamstrings. When you sit down on a chair, those muscles are relaxed and become shortened and tight.  When they are tight, they pull on your hips and, in our experience, have been one source of classic lower back pain.  There are other sources, of course, i.e., bulging discs, arthritis and even infection.  But we’ve found that stretching those hamstrings goes a long way in resolving that uncomfortable lower back.

According to physical therapists, the most effective way to stretch those hamstrings and many other muscle sets is the Down Dog pose (aka Downward Facing Dog, or Adho Mukha Svanasna).

It is a rather simple pose that involves your entire body.  You start on your hands and knees, hands under shoulders, knees under hips.  With an exhale, up you go, bringing your rear end up, your head between your shoulders and your legs as straight as you can get them.  Spread your hands out like a star fish and gaze back at your shins while keeping your neck in line with your spine. The ideal is to plant your heels down on the floor while your legs are straight, your spine lengthened and your belly button drawn into your spine. Chances are, you’re not going to get your heels down if you’re just starting.  Or perhaps never. Most people feel comfortable just “pedaling” their heels up and down as a first step to getting comfortable.

Breath slowly and deeply from your belly button.  You are strengthening your shoulders, neck, back, glutes, and lots of other muscles while you are stretching your hamstrings.

One-Legged Down Dog is an easy variation.
Credit: Yoga Basics

From Down Dog, you can transition to Plank, hold that for 10-20 seconds, and then go back to Down Dog.  Back and forth between those two is a tremendous stretching and strengthening exercise. Breathe deeply and slowly. We’ve heard this combination is used in various military boot camps to get recruits into shape.

There are several variations you can use once you get into Down Dog.  Lifting one leg straight up is one.  There are others which you can check here.

As usual, if you have any carpal tunnel, shoulder, back, joint issues, or unregulated high blood pressure, please check with a health care professional before you try any of these stretches.

Here’s a demonstration and tips for correcting common problems in doing Downward Dog.

https://www.youtube.com/watch?v=4Z8rZJ6sk48


Fitness Focus: Plank, Plank, Plank

This Pose Is Considered The Simplest, Most Effective Core Strengthener.

Pretty basic, but effective. It’s easy to do it incorrectly so study up.
Credit: Yoga Lily

“Plank, plank, plank,” says Jan, the exercise instructor at the head of our class.  After an hour of kick boxing, we start the floor exercises to end the session.  We get into plank position as she intones, “Plank, plank, plank”. The seconds roll by.

High plank or Phalakasana pose. The most glorious of simple exercises, body weight held in place by core strength.  Arms, wrists, shoulders, lower back, abs, gluts, all working to hold the position.

The proper plank position can be found by putting your hands under your shoulders, extending up to a full, high plank on your toes, body a straight line from heels to back of head, eyes focused about a foot ahead of you, chin tucked. Basically, it’s like the top of a push-up, making sure your body is straight and not sagging or arched. While you’re up there, you can flex your feet, bend one knee in, then the other. Put one foot’s toes on the heel of the other foot, then switch. If you hold yourself still, you can feel your muscles adjusting and keeping you balanced.

High plank can be modified by resting on your knees versus your toes. That might be a good place to start if you haven’t done core exercises in a while.

If your wrists are sensitive, you can support yourself on a pair of dumb bells or yoga blocks. If you have hand or wrist issues, like carpal tunnel or rotator cuff, you’ll have to get some advice from a physical therapist or yoga instructor to help mitigate those conditions.

You can also move from high plank to low plank, moving down to resting on your forearms, arms extending in front of you, one arm at a time.  Then, back to high plank.  And then down to low plank. Do this slowly while mindfully keeping your body in a straight line position.  Man, that’s a work out.

The benefits are impressive; you get toned up in the middle, and you will find yourself using those newly strengthened core muscles to support your back when lifting, twisting, even walking.  We’ve found that lower back problems can be addressed with a strong core.  Your posture will improve, too. Your mileage may vary, but plank and other exercises focused on the core can definitely help that lower back.

The experts say you should shoot for 30 seconds as a beginner to get into this.  Eventually, if you can hold plank for two minutes, you’re doing very well.

You can find more advice from experts on how to safely and properly do plank here.  Jen Reviews has a number of pointers and caveats on doing this exercise.  More advice from the Yoga Outlet here.   Jen Reviews sums up the major benefit of planking:

Planks are a very versatile exercise that target a lot of the most important muscle groups in the body. The core muscle groups are responsible in some way for helping us carry ourselves through almost every action we’ll perform in a day, so making sure your core strength is in check is absolutely vital for someone who wants to leave a healthy lifestyle.

Plank pose is also one of the Sunrise Salutation series of connected poses that cycles through all your muscles, flexing, and strengthening all of you.  We’ll talk about the Sunrise Salutation in another Fitness Focus because it is a really awesome way to start the day.

You can incorporate plank as well as last week’s squat exercise along with others in a regime of strengthening, stretching and flexing that will keep you feeling good.

As with all new activities, please consult your doctor, physical therapist or exercise professional if you have any issues that might cause concern.


Fitness Focus: Do You Know Squat?

Squat Lately? Try It Every Day For A Week And See What Happens.

Editor Note: This week marks the beginning of our summer exercise series, Fitness Focus, where we will highlight one particular exercise, activity, stretch, or pose that leads to increased strength and flexibility.  Our first is the ubiquitous, simple, and under-appreciated squat.

Did you know the squat sit, or the crouch—feet planted shoulder width, as flat on the ground as you can get them, backs of thighs on calves—is one of the most useful and healthy poses you can assume at the gym, at home, or anywhere?

Hanging out in the squat sit is common in many parts of the world.
Credit: Asian People Like

If you’ve traveled in Asia, you’ve seen squat toilet facilities, people chatting with neighbors while squatting, and even squatting while waiting for trains or buses. Children everywhere squat, too, playing in the sand or around a collection of toys. The squat position is a natural pose, something we have grown out of as we grow up and sit at desks and on chairs. Yet, the squat is a powerful and effective position you can use for flexibility as well as strength training.

You can simply squat sit, or you can raise and lower yourself with or without weights.  Learn how to do a body weight squat by clicking here.

Jamie Lauren Keiles’ recent “Learning To Squat” in The New Yorker extols the virtues of this simple exercise. She writes,

“Squatting involves the whole body. The legs and the hips control the lowering motion, while the abdominals and the lower-back muscles work to stabilize the torso. Add a weighted barbell along the span of the shoulders, and the deltoids and the arms become implicated, too. Weight-bearing squats help to improve balance and flexibility and build muscular strength. In a squat’s concentric phase, as the legs extend to stand, the gluteus contracts to pull the hips forward.”

Malasana or garland pose is a squat sit that might be a good place to start.
Credit: REI

You don’t have to flex up and down to get the benefits of the squat position.  In yoga, you can assume malasana or garland pose, where you assume a wide stance—almost a plie position, squat down, lowering your hamstrings to your calves, putting your elbows inside your knees and your hands in front of your chest. Hold that for 30 seconds, gradually building up to a minute or so, and you will be stretching lower back, glutes, hamstrings, inner thighs, and working your core.

From the NYTimes Magazine, What’s the Best Exercise?:

“I nominate the squat,” said Stuart Phillips, Ph.D., a professor of kinesiology at McMaster University and an expert on the effects of resistance training on the human body. The squat “activates the body’s biggest muscles, those in the buttocks, back and legs.” It’s simple. “Just fold your arms across your chest,” he said, “bend your knees and lower your trunk until your thighs are about parallel with the floor. Do that 25 times. It’s a very potent exercise.” Use a barbell once the body-weight squats grow easy.

Click on the picture to learn how to do a body squat.
Credit: New York Times

So you have options: squat with or without weights, flexing up and down, or assume the malasana or garland pose.

To state the obvious, if you have any issues with knees, hips, or lower back, you may want to consult a trainer, physical therapist, or your physician before you try any squatting variation.

Adapting your workout to your age.

Stamina, skiing and senior skiers.

Have you noticed that the older you get, you have to work out harder to maintain an ever-decreasing level of conditioning?  Yeah, yeah, yeah…  I know all the reasons but the reality is vigorous work-outs just delay the inevitable.  As we get older our:

  • Bodies aren’t as flexible;
  • Bones are more brittle;
  • Muscles don’t recover as fast; and
  • We lose muscle mass and brain function.

Since I’m losing brain muscle, that must be why I can’t remember why I should stop skiing, so I keep riding lifts.  Then I have to remember how to get down!

Marc Liebman recommends elliptical training for senior skiers.

Seriously, what I did to keep in skiing shape at 40 isn’t appropriate for someone who is 71.  Like my body, it has evolved over time.  Back when I was just four decades old, I ran a 10K five to six times a week at a 7.5 minute per mile pace.  Plus, I did chair sits, squats that strained my thighs and calves, crunches to build my core and other stuff.  All in the name of conditioning for skiing.

Workout menopause started at age 60 during a visit to an orthopedic surgeon.  He gave me a “twofer” of bad news after looking at an MRI.  First, he said if you keep running you’ll need new knees around age 65.  Second, I needed surgery to repair a torn and worn meniscus.  What a bargain!

That was the last day I ran, did squats and chair sits because they strained my joints way too much!  My workout evolved into 50 minutes on an elliptical at least five days a week going fast enough with enough resistance to get my heart rate into the 140s.  Interval training led to strained groin muscles that took months to heal.  My goal in each session is to burn at 475 – 500 calories and cover 4.3 miles.  Crunches and a daily 3.5 mile walk minimize the strain on my leg joints.

All this is in the name of building stamina.  If my legs are dead tired, it is hard to turn or stop which could lead to a bad fall and/or slamming into a tree, lift tower, or worse,  another skier…

I also do much more stretching now than I did before. My focus is on maintaining flexibility. Over time, my body has told me my groin and hamstrings need stretching, and I’ve learned the hard way to listen.  Stretching is also important if for nothing else, flexibility minimizes the pain and strain of putting on ski boots!

You have to tune your body.  Nobody else can.  I’m not big on personal trainers but if that’s what it takes, go for it.  Just remember, as you get older, the whole conditioning process takes more calendar and workout time and effort.  The pay-off in building stamina and keeping flexible is longer ski days.  For me that translates to 27 to 30 thousand vertical.